
Fresh construction can make a property look nearly finished while the windows tell a different story. Fine drywall dust, paint specks, adhesive residue, silicone, mortar, and jobsite grime can leave new glass looking cloudy or scratched if they are handled the wrong way. This guide to post construction window cleaning explains what should happen before, during, and after the final window clean so homeowners, contractors, and property managers can protect the finished work.
Post-construction cleaning is not the same as routine window washing. The goal is not simply to make glass shine. It is to remove construction-related debris carefully, inspect the windows for issues, and leave the property ready for move-in, sale, occupancy, or a final walkthrough.
Construction debris can be abrasive. Drywall dust, concrete particles, masonry dust, and sand may look harmless, but rubbing them across glass can create scratches. Paint overspray and tape adhesive also tempt people to scrape aggressively, which can damage glass coatings, frames, seals, screens, or surrounding finishes.
New windows are especially worth protecting. Some glass has factory-applied coatings, while tempered glass can contain tiny fabrication debris that may scratch the surface when a blade is used improperly. Frames may have fresh paint, caulk, or protective films that need a different cleaning method than the glass itself. What works on one window may not be appropriate for another.
That is why timing and technique matter. A careful cleaner starts with an inspection, identifies the type of debris, and chooses the least aggressive method that will get the job done. The cleanest-looking result is not worth a damaged pane or a scratched frame.
Window cleaning should happen after the dust-producing and splash-prone work is complete. If drywall sanding, masonry work, exterior painting, floor grinding, or caulking is still underway, a final window cleaning may need to wait. Cleaning too early can mean paying for the same windows to be cleaned twice.
For most projects, there are two useful stages. An initial clean may be needed before final inspections, photography, or interior finishing. The detailed final clean should come after trades have completed their work, protective coverings have been removed, and the site has received its general construction cleanup.
Coordination makes a difference on commercial properties and larger renovations. Property managers and contractors should confirm whether windows are accessible, whether lifts or ladders are needed, and whether other crews will be working around the glass. On a busy site, a clean window can be dirty again in a few hours.
In Western Pennsylvania, weather can also affect scheduling. Rain is not always a problem for professional window cleaning, but freezing temperatures, high winds, muddy access areas, and active exterior work can change the plan. A dependable service provider will set expectations clearly rather than rushing a job under unsafe conditions.
The first step is a close inspection of the glass, frames, tracks, screens, sills, and surrounding trim. This creates a record of the window condition before cleaning begins and helps identify damage that may have occurred during installation or construction.
Look for cracked panes, broken seals, chipped frames, loose glazing, damaged screens, paint on weatherstripping, and deep scratches. It is also useful to note labels or manufacturer instructions still attached to new windows. Those instructions may include specific recommendations for cleaning coated glass, vinyl, aluminum, wood, or composite frames.
This is also the point to separate removable debris from bonded residue. Loose dust should be removed before any wet cleaning begins. A wet cloth pushed across gritty glass can turn a simple cleaning job into a scratch risk.
A professional post-construction window clean generally begins with dry removal. Vacuuming tracks, sills, and frames with soft attachments helps remove dust, sawdust, and loose grit without spreading it around. Screens should be inspected and cleaned separately so dirt is not transferred back to the glass.
Next comes a controlled wash using clean water, appropriate cleaning solution, and non-abrasive tools. The purpose is to lift soil from the surface, not grind it into the pane. Clean microfiber towels, soft scrub pads approved for glass, and professional squeegee techniques help produce a clear finish without leaving lint or streaks.
Paint, tape, stickers, caulk, silicone, and other residues require judgment. Some materials release with a gentle solvent or a longer dwell time. Others may need careful mechanical removal. Before using a scraper or chemical product, the cleaner should test a small, inconspicuous area and confirm it is safe for that particular glass and frame.
A blade should never be treated as the default answer. It can be useful in limited situations when used correctly on suitable glass, but it carries real risk, particularly on tempered or coated panes. Aggressive scraping can reveal or create scratches that are much more noticeable once the window is dry and sunlight hits it.
Clear glass will not make a window look finished if the tracks are packed with drywall dust or the frames are marked with paint. Window tracks can hold a surprising amount of debris after construction, especially in newly installed sliding windows and doors. If left behind, that debris can affect drainage, make windows harder to operate, and collect moisture over time.
Frames need a gentler approach than glass. Strong solvents, abrasive pads, and harsh cleaners may discolor vinyl, dull painted finishes, or damage protective coatings. Cleaning products should be selected for the frame material, and excess water should not be allowed to sit in wood components, joints, or interior finishes.
Screens should be removed only when it is safe to do so and cleaned with light pressure. Bent screen frames and torn mesh are easy to create when workers are rushing. On commercial buildings, screen handling and reinstallation should be part of the final quality check.
The biggest mistake is assuming every spot on glass can be scrubbed or scraped away. A window may look dirty because of residue, but it may also have damage from construction activity. Trying to force a perfect result can make the condition worse.
Another common issue is using a dirty bucket, worn towels, or contaminated tools. Post-construction dust is fine and abrasive. Once it gets into a cleaning tool, it can be carried from one window to the next. Fresh water, clean tools, and frequent towel changes are part of protecting the finish.
It is also unwise to use household products without checking compatibility. Some cleaners can affect window films, hardware finishes, sealants, or newly painted trim. Products that smell strong are not necessarily better, and more chemical does not always mean better results.
Finally, avoid treating safety as an afterthought. Second-story residential windows, storefront glass, upper-level office windows, and windows above landscaping or hard surfaces require proper access equipment and trained workers. A fully insured cleaning team helps reduce the risk that comes with ladders, elevated work, and handling large panes of glass.
A homeowner may be able to handle light dust on a few accessible windows after a small project. The decision changes when there is extensive paint overspray, renovation debris, hard-to-reach glass, multiple stories, new specialty windows, or a deadline tied to a sale or occupancy.
Professional service is particularly helpful when the property needs more than a quick wipe-down. A trained team can evaluate residues, use appropriate equipment, clean interior and exterior surfaces, address tracks and screens, and work through the job in an organized way. For commercial properties, that consistency matters when tenants, customers, and inspectors are about to see the space.
A Clearvue provides insured, professional window cleaning for homes and businesses throughout the Pittsburgh area, with service that can be scheduled around your project timeline. A free estimate gives you a clear starting point before the final cleanup begins.
Before calling, gather a few practical details: the number of windows, whether cleaning is needed inside and out, the types of residue present, the building height, and the desired completion date. Photos can also help communicate the scope of the work. Clear information helps a cleaning provider plan safely and price the job accurately.
Once cleaning is complete, inspect the windows from inside and outside if possible. Check the glass in natural light, look along the edges and corners, operate moving windows, and make sure tracks and sills are free of visible debris. This is the best time to spot missed residue, damaged screens, or marks that need to be documented for the contractor.
A properly cleaned window does more than improve the view. It lets the quality of the new construction, renovation, or property refresh show through. Schedule the final cleaning when the work is truly ready, and the finished space will look cared for from the first glance.




* Suspended Grids / False Grids – the grids are between your panes of glass.

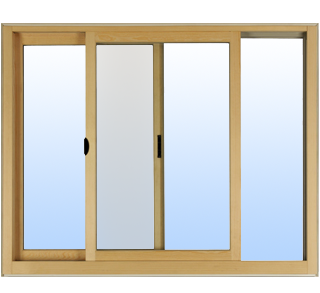


* Fixed / non-removable grids – These are windows with non-removable obstructions making the window look and feel like individual pieces of glass.